Basketball is one of the most popular sports in the world. It is a great way to stay active and fit, and people of all ages can play it. You may have considered building your own basketball court if you are a basketball fan.
Building a backyard basketball court can be a fun and rewarding DIY project. The process of designing and constructing the court will require some planning and hard work, but the result will be a great addition to your home and provide years of enjoyment.
But, the thought of building something like that yourself can be daunting. However, building your DIY basketball court can be an enjoyable and successful experience with the right tools and some know-how.
In this article, we will provide a step-by-step guide on how to build a basketball court.
We will also provide tips on what type of court you should build and what materials you need. So, whether you’re a basketball fanatic or just looking for a fun weekend project, read on for everything you need to know about building a DIY basketball court.
Now let’s get started.
The Process of Installing a DIY Backyard Basketball Court
Installing a DIY basketball court is a great way to bring exciting entertainment to your yard. However, before you start digging and laying out the court lines, there are a few things you should consider and plan for to ensure a successful outdoor basketball court installation.
Determine Court Dimensions
It is not difficult to build a backyard basketball court, but it requires careful planning and execution in order to achieve a successful, fun, and rewarding DIY project. The first step is figuring out the dimensions of the basketball court, which will determine the amount of space required.
To ensure that your backyard can accommodate a full-sized court, it’s essential to measure the area accurately. If your backyard is not big enough to support a full court, don’t worry; you can still enjoy a game with a half-court.
Half-courts can be either 47 feet by 50 feet or 42 feet by 50 feet, depending on your preference. With the right measurements and planning, you can create a backyard basketball court that meets your needs and provides hours of fun for you and your friends and family.
Choosing Between Concrete and Other Options
If you’re considering building a basketball court in your backyard, it’s important to choose the right type of flooring. Two popular options are premade rubber sports tiles and plastic polymer mixes that can be applied directly over concrete or without a concrete slab.
It’s important to do your research before making a decision. We’ll provide an in-depth comparison of both options to help you make an informed choice that best suits your needs.
Option 1: Premade Court Floor (DIY Basketball Court Without Concrete)
If you’re looking for a DIY basketball court cheap and hassle-free option, a premade court floor made of interlocking sports tiles or a plastic polymer mix may be the way to go.
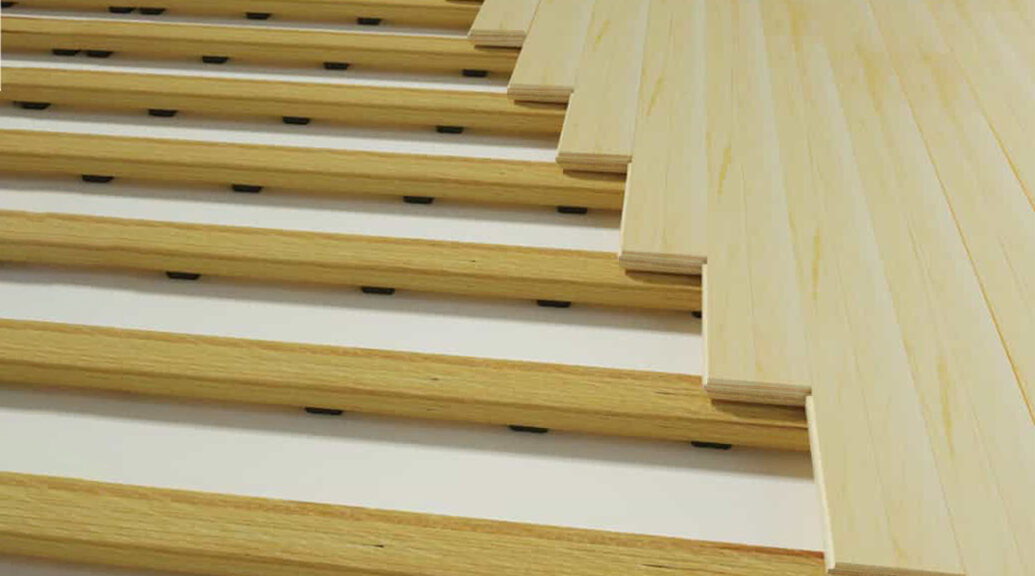
Interlocking sports tiles come in a variety of colors and patterns, allowing you to create a custom look for your basketball court. They also have a shock-absorbing feature that reduces the impact on joints and helps prevent injuries during play. This is particularly important for younger players who are still developing their motor skills.
To create a basketball court, start by measuring the space you have available and determining the number of tiles you will need. Interlocking sports tiles are easy to assemble, simply connect the tiles together like a puzzle to form a sturdy and seamless surface. The tiles can be cut to fit around obstacles or to create custom shapes if needed.
Once your court is assembled, you can add the finishing touches like boundary lines, a basketball hoop, and any other accessories you may want. With a DIY basketball court, you can enjoy the game anytime you want and even invite friends and family over for some friendly competition.
Upgrade your basketball playing experience with the high-standard DIY basketball court flooring made from TPE (Thermoplastic Elastomer) material by VMKON Sports.
Our flooring guarantees safety, performance, and durability, ensuring you can play confidently for years to come.
Our basketball court is specifically designed with VMKON GameChanger+ Instelocking Sports Tiles, providing you with a seamless installation process and a comfortable playing surface.

Elevate your game and create your own professional-grade basketball court with VMKON Sports.
Option 2: Concrete Slab
To create a concrete slab basketball court, you will first need to prepare the area by leveling the ground and adding a base layer of compacted gravel. This will help to ensure a stable and even surface for the concrete. Then, you will need to create a form using wood or other materials to define the area of the slab.

While concrete slabs are a great option for outdoor basketball courts, they do have some potential drawbacks. Concrete can be hard on joints, so it is important to add a shock-absorbing layer like a rubberized surface or interlocking sports tiles to reduce the impact on players. Additionally, concrete can become slippery when wet, so it is important to add a textured surface or use non-slip footwear to prevent falls and injuries.
However, the process of installing a concrete slab can be more time-consuming and labor-intensive than using a premade court floor.
Gather Materials and Tools.
Building a DIY basketball court backyard requires proper planning and preparation. Gathering all the necessary materials and tools beforehand is crucial to ensure a successful project.
This includes basketball hoops, concrete (if applicable), a stencil, tape measure, a tamper, and twine or stakes to mark the court. With these essentials, you can build your dream court confidently and easily.
Set Your Floor & Hoops: After collecting all the necessary materials, the next step is to prepare your court by setting up the floor and hoops. Begin by measuring out the area and marking it with stakes and twine for accuracy. To ensure a level surface, use a string-level tool throughout the process.
Installing a court floor can be simple when using premade tiles or plastic polymer mixes. All you need to do is ensure the surface is level before installation.
However, you may need to work with a concrete contractor if you prefer to pour your own concrete slab. Alternatively, you can create a frame using supported 1-by-4-inch or 2-by-4-inch plywood and lay your rebar across the plane.
Once the frame is complete, pour your concrete to a minimum thickness of 4 inches. This will ensure that your slab is strong and durable. For best results, it is recommended to lay your hoop/s in the concrete while it is still wet.
This ensures a secure and stable base for your hoops. Properly level and align your hoops to avoid any potential issues during gameplay.
Allow the Concrete to Cure: After setting up your floor and hoops, it’s imperative to allow ample time for the concrete to cure. The curing process typically takes up to 28 days, so it’s essential to exercise patience before using your basketball court.
Rushing the process can lead to unwanted cracks and damage, which can compromise the court’s durability and functionality. Therefore, giving the concrete enough time to dry before enjoying your newly constructed basketball court is vital.
DIY Basketball Court Lines Paint: After your concrete has fully cured, it’s time to add the finishing touches by painting the lines. To make this process easier, you can either use a stenciling kit or do it manually. If you opt for the stenciling kit, follow the instructions provided.
However, if you decide to do it by hand, be sure to paint the free-throw lane (measuring 12×19 ft.), the free-throw line (which should be 15 feet from the center of the hoop and 12 ft. long), the center line (which runs from one side of the court to the other).
And finally, the out-of-bounds line (which should be around 2-3 inches thick and should be painted around the entire court).
VMKON Provides you with pre-painted basketball court lines according to your dimensions and requirement so you won’t have to worry about painting lines on the court.
Complete Your Court with Accessories: Once you’ve finished painting the lines, it’s time to add some finishing touches to your court. You can take it to the next level by adding personalized touches, such as painting your team’s logo or choosing a vibrant color scheme.
Consider installing a durable containment fence to keep the ball in play and ensure the safety of players and spectators. It’s essential to hire a professional to install the fence correctly. Don’t forget to hang the nets and acquire a ball before you start playing.
Make Sure It’s Safe: When it comes to building your own backyard basketball court, safety should always be your top priority. Saving money should never come at the expense of safety.
If you’re using concrete, ensure its poured correctly to prevent any cracks or uneven surfaces. Proper installation of the hoop and other elements is also critical to ensuring a safe playing environment.
Don’t overlook even the smallest details, and take the necessary steps to ensure everything is secure before playing with your kids. By prioritizing safety, you’ll be able to enjoy your new court with peace of mind.
Do-It-Yourself (DIY) or Hire a Professional?
If you have the skills, time, and resources, you can consider installing a concrete slab on your own. However, be prepared for a significant undertaking that requires serious planning and preparation.
You’ll need to construct a sturdy wooden frame, lay all the necessary rebar to support the slab, mix the concrete, and pour it into the frame. Renting equipment, such as a concrete mixer, may also be necessary to make the job easier.
While this can be a rewarding DIY project, weighing the effort and cost against the benefits is important. Alternatively, hiring a professional concrete company to install the slab may be more convenient and efficient.
This will ensure the slab is installed properly and to a high-quality standard but will come at a higher cost. Ultimately, deciding whether to install the concrete slab yourself or hire a professional will depend on your personal preferences, experience level, and budget.
Ultimately, the decision to use a premade court floor or a concrete slab depends on your budget, preference, and skill level. There are several reasons why a premade court floor may be the best choice for you if you prioritize convenience and affordability.
An interlocking sports tiles flooring is the better choice if you value durability and longevity and it is very easy to install and move. Whatever you decide, plan carefully and follow the steps to ensure a safe and enjoyable backyard basketball court.
Conclusion.
Building your DIY basketball court can be fun and rewarding for you and your family. Following these step-by-step instructions, you can create a high-quality court that will provide hours of entertainment for years.
Whether you build a full-sized court or a half-court, take the time to properly prepare the site, choose the right materials, and follow all safety guidelines. You can have your basketball court in your backyard with a little effort and dedication.
FAQs
How Do You Make a Homemade Basketball Court?
Select a spot and measure out the dimensions for the court. Prepare the surface by removing obstacles and leveling. Install the base and poles for the hoop. Lay down the flooring and mark the court lines with paint or tape.
How Much Would It Cost to Make a DIY Basketball Court?
The cost of making a DIY basketball court can vary depending on various factors, such as the size of the court, materials used, location, and labor costs. On average, a half-court basketball court can cost around $3,000 to $10,000, while a full-size court can cost between $10,000 to $30,000 or more.
What Can You Use to Make a Basketball Court?
A basketball court can be made using a variety of materials such as concrete, asphalt, VMKON synthetic floor, or even a wooden surface. The choice of material depends on the location, budget, and required durability. Additionally, markings and lines can be painted on the surface to indicate the court’s boundaries and other important areas.
How Should Thick Concrete Be for a Basketball Court?
The thickness of concrete for a basketball court depends on various factors such as the climate, type of soil, and expected usage. A basketball court typically requires a concrete slab of 4-6-inch thickness.
This thickness ensures stability and support for players and their equipment. Consult a professional contractor to determine the appropriate thickness for your specific needs.
How long does this usually take to install interlocking sports tiles for the basketball court?
For a typical half-court basketball court, installation of interlocking sports tiles can take anywhere from a few hours to a full day. This includes preparing the subfloor, laying out the tiles, and connecting them together. The tiles can be easily cut to fit around obstacles or to create custom shapes, which can add some additional time to the installation process.
Could interlocking sports tiles be installed over surfaces other than concrete?
No, interlocking sports tiles can be installed over a variety of surfaces, including concrete, asphalt, and even compacted dirt or gravel. This makes them a versatile option for creating a basketball court or other sporting surface in almost any location.
When installing interlocking sports tiles over a non-concrete surface, it is important to ensure that the subfloor is stable and level. This may require adding a base layer of compacted gravel or other suitable material to create a solid foundation for the tiles.
How many interlocking tiles do I need for a full basketball court?
Each tile is 1 foot so you can calculate according to your court size or contact us our representative will guide you better.